Press "Enter" to skip to content

Author: ck

Update: T-SQL Notebooks in Azure Data Studio

It’s only been ten days since my first post about ADS Notebooks, and the team has already pushed out some super useful updates.

Now launching an Azure Data Studio Notebook now is almost instantaneous. You are not prompted to install the other kernels unless you select them.

When reopening a file, you no longer are prompted to re-install a kernel and attempt configuration.

Displays Azure Data Studio Notebooks behavior when reopening a notebook

Big thanks ADS team, Notebooks look to be shaping up to be a super cool tool!

T-SQL Notebooks in Azure Data Studio

Update: This blog post is already out of date due to the hard work of the ADS team! Check my Azure Data Studio Notebook Update for more details of why you can skip my warnings about your internet connection.

I have been waiting for word about the new Notebook functionality in Azure Data Studio, and when I heard it was available in the insider build, I jumped in to take a look.

A Jupyter Notebook is a web application that allows you to host programming languages, run code (often with different programming languages), return results, annotate your data, and importantly, share the source controlled results with your colleagues.

Alright, here’s what I did:

  • Grab the insider’s build from Github.
  • Install Azure Data Studio (ADS.)
  • Create a new Notebook (and have it download some stuff.)
  • Run some queries!

Keep in mind I am talking about the Insider’s Build as of as of Thursday March 7, 2019 – if you download it in the future changes are likely to have occurred.

If you want to follow along, make SURE you have a solid internet connection available, planes do NOT count.

Jump to the ADS Github page

Scroll to the latest insiders builds:

Extract or install, and launch Azure Data Studio.

Keep in mind you may want to disable updates when running the insider version, as it will try to update to the stable channel version. Thanks to Shawn Melton for the tip!

Install the tools by choosing File -> New Notebook.

The install process will warn you this will take awhile to download and configure the Jupyter environment (which includes python and a few other dependencies.)

Every time you create a new notebook, you are going to download the required dependencies from scratch – this is to ensure you have an isolated environment per notebook, but its worth keeping in mind for now.

Go get some coffee, its going to be a bit.

Maybe time for that second cup.

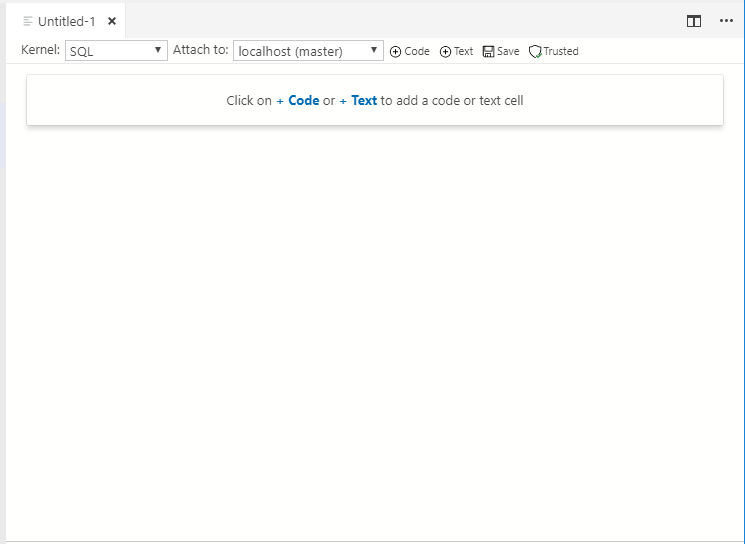
When our new notebook pops up, you should immediately be offered an option for a Code(TSQL) or a Text(markdown) box.

I wrote two example queries and added an animated gif (mostly because I was watching Chris on the SQL Tools team doing the same on the sqlbits presentation for ADS https://sqlbits.com/Sessions/Event18/Introducing_Azure_Data_Studio )

All the data you return is saved into your notebook, so you can see the same results as I did if you download my notebook, and you can replay it in your environment to see if it is the same.

Going to end it there for now, but I am excited to see what people will begin passing around in notebooks for debugging, training, and demonstration purposes!

Some issues I am going to be keeping my eyeballs on the next few weeks:


Removing non-numeric characters from a SQL Server field without UDFs or Regex

A great question came up in the SQL Community Slack today:

I saw this as a great modification on my earlier post, and wanted to show another way to implement the same solution.

Walking through the steps:

First, use sys.objects as our example “target” and assume the string has less than 2024 characters (spt..numbers isnt really reliable past that point.)

We substring out each character and compare it to the list of items we accept, and then collapse the list back in on itself.

At the end, I pull out sys.objects for comparison so you can see what sort or results you would get. Enjoy!

Short and Sweet – Implementing simple character masking without UDFs

I’ve been on a bit of a hiatus with the move to California and figuring out my new life here.

I needed some inline TSQL to mask a string based on a simple masking input, like ‘##xx##’ where # would return data and X would return X.

Here’s the code, actually a bit simpler than I thought it would be.

The first table would be the one you would be using (I used sys.objects as an example), and if you wanted to store a masking string then you’d just want to make sure it was joined and projected in the substring instead of the @formatstring.

How long did that last PowerShell command take?

Today Thomas Rayner’s post on Get-History reminded me of a one liner I use to calculate time spent on the last command.

(Get-History)[-1].EndExecutionTime - (Get-History)[-1].StartExecutionTime
Days              : 0
Hours             : 0
Minutes           : 0
Seconds           : 0
Milliseconds      : 87
Ticks             : 870022
TotalDays         : 1.00696990740741E-06
TotalHours        : 2.41672777777778E-05
TotalMinutes      : 0.00145003666666667
TotalSeconds      : 0.0870022
TotalMilliseconds : 87.0022


You can select any property from the output and get just the TotalSeconds, but I like this simple output for when I have to leave some work in progress and I need to come back and check some time in the future.

If you are confused by this code and want further explanations, keep reading!

A typical Get-History call returns the following to Get-Member.

PS C:\temp> Get-History | Get-Member

   TypeName: Microsoft.PowerShell.Commands.HistoryInfo

Name               MemberType Definition
----               ---------- ----------
Clone              Method     Microsoft.PowerShell.Commands.HistoryInfo Clone()
Equals             Method     bool Equals(System.Object obj)
GetHashCode        Method     int GetHashCode()
GetType            Method     type GetType()
ToString           Method     string ToString()
CommandLine        Property   string CommandLine {get;}
EndExecutionTime   Property   datetime EndExecutionTime {get;}
ExecutionStatus    Property   System.Management.Automation.Runspaces.PipelineState ExecutionStatus {get;}
Id                 Property   long Id {get;}
StartExecutionTime Property   datetime StartExecutionTime {get;}

Ignoring the methods (as they are common) we see we have access to some useful properties:

  • The CommandLine which contains the text typed in the console.
  • The ExecutionStatus which tells you if your command was successful.
  • The StartExecutionTime and EndExecutionTime, which store the start time and end time of your running command.
  • The Id, which is just a sequential integer indicating its order in the history.

As is common in PowerShell, even though we see the list of members and properties the information actually only represents one item in the list of objects the command returns, one for each history row.

If you want to see an example this, we can use PowerShell’s comma/unary operator to roll our multiple elements into one bag of elements.

PS C:\temp> $many = Get-History # Assign all our Get-History rows to $many
PS C:\temp> $one = , (Get-History) # Prevent unrolling the items with the , 

PS C:\temp> $many.Count # I ran 18 previous commands when this was assigned
18
PS C:\temp> $one.count # This is a bag holding 18 items
1

This technique was new to me when I first started PowerShell, but a useful trick if you want to write a function that returns an object representing the entire list, instead of returning a series of elements. If you want to learn more about the Comma operator, check the documentation in about_Operators.

The next step is to ask for the first element of a list, which PowerShell supports with bracket notation (list)[element_number], with 0 being the first number (as all sane programming languages choose.)

We use dot notation to access the properties of EndExecutionTime and StartExecutionTime, once each for our specific list item, (list)[element_number].property.

Lastly, we subtract the properties from one another (list)[element_number].property – (list)[element_number].property, which PowerShell determines behind the scenes is two dates being subtracted, performs the required math, and usefully returns a useful System.TimeSpan type representing the time between the two dates.

Special thanks to Contributing Editor John G Hohengarten for his thoughtful additions to this post.

Would you be involved with PASS without a SQL Saturday?

I wanted to bring you a quote from #SQLSaturday channel in the SQL Community Slack that I found amazing:

“They [the PASS board] are already signaling they don’t want to spend $$ on SQL Sat and a few of the board members would just as soon SQL Sats die.”

Having missed the Q/A at the Summit, this blew my mind.

Everyone I know who joined PASS had a requisite SQL Saturday or local user group to get them interested and welcomed into the community.
Even after my second SQL Saturday I didn’t really recognize what PASS was (beyond my local UG) and if someone had asked about the international org, I would have responded with (at best) “uh, sure, I guess?”

In my opinion, the local user groups are the primary thing that matters, the national/international components of the org may put out a few high quality webinars on a weekly basis, but 99% of that content is not related to my problems at hand. The local UG/SQL Saturday gives me valuable time with experts which I don’t have to pay thousands of dollars for to get on a plane or buy a ticket to the Summit.

If you ask the question “Would the SQL PASS Summit exist without SQL Saturday?” I think the answer is no, or if yes, then a much smaller less welcoming affair.

Agree or disagree?

I would love to hear more from the community whether they cherish and think SQL Saturday should be funded, or if it seems like a dead end activity for PASS.


Slack Asks: Scripting out all objects from a SQL Server database with PowerShell and dbatools

@brianszadek says: I am looking to automate the scripting of objects with PowerShell for easier source control integration.

I thought this would be a little bit easier, but it looks like the SMO way of doing this is still fairly complicated. Maybe something I can look at simplifying for the project in a bit 🙂

For completeness I also included my favorite tool (schemazen) and Microsoft’s new scripting tool if you want a quick shell approach.

PowerShell: (dbatools)

$SqlInstance = "192.168.0.23,1433"
$DatabaseName = "breakme"
$Server = Connect-DbaInstance $SqlInstance
$Database = $Server.Databases[$DatabaseName]

# Define an empty list
$ObjectList = @()
$Options = New-DbaScriptingOption
$Options.AllowSystemObjects =
  $Options.AppendToFile = $false

$Options.Triggers =
  $Options.ToFileOnly =
  $Options.ScriptBatchTerminator =
  $Options.DriAll =
  $Options.Indexes =
  $Options.Default =
  $Options.SchemaQualify =
  $Options.ClusteredIndexes =
  $Options.NonClusteredIndexes = $true

# Surprisingly, $Database.EnumObjects will return a set of strings, not SMO objects, this is kind of sucky.
$ObjectList += foreach ($ob in $Database.EnumObjects()){ # Get all objects
  if ($ob.Schema -notin "sys","INFORMATION_SCHEMA"){ # Not in system schemas
    $o = $Database.Resolve($ob.Urn) # Resolve the object path to an SMO object
    if (($o | Get-Member | Select-Object -exp Name) -contains "Script"){ # If it has a script property
      $o # Return it
    }
  }
}


function Rename-ObjectToSqlFile {
  param ($ObjectName)
  $Name =  $ObjectName -match '.*\/(.*)'
  if ($Name -eq $false){
    $Name = $ObjectName
  } else {
    $Name = $matches[1]
  }
  $Name = $Name + ".sql"
  return $Name
}

# Iterate, get one file per object, decide on how you want to name them, because things like event notifications are uris
foreach ($obj in $ObjectList) {
  $Name = Rename-ObjectToSqlFile -ObjectName $obj.name
  Export-DbaScript $obj -ScriptingOptionsObject $Options -Path $Name # Export it with the dbatools powers
}
# Or export based on category
Export-DbaScript $ObjectList -ScriptingOptionsObject $Options # Export object categories to each file

Note: Export-DbaScript currently has a bug that prevents servers using SQL Authentication from scripting, this has been fixed in the next version.

Command line executables

Schema Zen (C#) (Free, OSS)

If you haven’t heard of SchemaZen, its a great and insanely fast tool for exporting all the objects in a database to a folder, and if needed, take the same folder and create a database from it.

There are also some experimental data export features.

MSSQL Scripter (python) (Free, OSS)

If you haven’t used the MSSSQL Scripter, its Microsoft’s tool that utilizes the new SqlToolsService to request and script out DDL information. They have a lovely architecture page if you want to learn more.

“Fixing” Visual Studio Code or PowerShell ISE Cached Variables

One of the features of both Visual Studio Code and the PowerShell Integrated Scripting Environment is allowing you to run a line of code with the F8 key.

This is super cool and useful, but it has a side effect because to validly be able to run a specific line of code, you often need to have stored all the results up to this point.

In my experience, I have received all sorts of strange behavior from both PowerShell ISE and Visual Studio code that came down to “oh, I remembered the last time you used that variable and now I am going to cause you problems.”

When I am writing code, I expect that adding a variable would mean that before you add it, it wouldn’t exist, and after you declared it, it would exist, we can see that behavior below:


However, in both VS Code and the ISE, if you run the same code again, you might be surprised at seeing the numbers of variables cease to change.

While the benefits are clear and deliberate, I prefer to be able to run from a clean slate each time, and PowerShell gives us a few mechanisms to do that. I thought about Get/Remove variable, but there’s no clear properties that I can see to distinguish user variables from environment ones, so this is what I came up with:

You can see, that now that we defined our code in a scriptblock, the variables do not leak out of their context and we can run our code over and over without worrying about existing variables.

Generating Tables of Contents for Github Projects with PowerShell

Table Of Contents


Initial Idea

Let”s generate a table of contents for a Github flavored Markdown document in PowerShell (because nobody else seems to have.)


Clarifying Our Requirements

After talking with Claudio, he didn”t just want a TOC for a particular markdown file (though that”s nice), but he also wanted a TOC for a set of files in a folder. I decided to do the first one, and it looks like Claudio just finished the second.

I did some googling and found that Github flavored markdown supports a special form of anchor linking as it isn”t supported in vanilla MD. I also found that beyond this there wasn’t a good anchor link MD shortcut, so I took this tact (which cares more about readability than speed or length.)

You can use the function below, which was also run on this blog post to generate itself.


The Code

function Convert-StringToMarkdownTableOfContents {
    param ([string]$MarkdownDocument)

    $nl = [System.Environment]::NewLine
    $TOC = "## Table Of Contents$nl$nl"

    foreach ($line in $MarkdownDocument.Split( $nl )){
        if ($line -match "^(#+)\s(.*)$") {
            $Count = $Matches[1].Length
            $Content = $($Matches[2])

            $EncodedContent = ($Content -replace " ",''-'').ToLower()

            if ($Count -eq 1){
                $TOC += "- [$Content](#$EncodedContent)$nl"
            }
            else {
                $TOC += "$("  " * $Count)* [$Content](#$EncodedContent)$nl"
            }

            $MarkdownDocument = $MarkdownDocument -replace "(($line)\w*)",$(
                ''<a href = "#'+ $EncodedContent +''"></a>'' +
                $nl +
                $line
            )
        }
    }
    return $TOC + $nl + $MarkdownDocument
}

You can download this code which generates this post Here.


Special Thanks

Special thanks to Cláudio Silva (PowerShell MVP) for giving me this fun idea!

Note:
Unlike Github Flavored Markdown, WordPress Markdown does not implement the anchor links, so in my blog they wont be clickable like they would github, sorry!

Automate and Simplify DBCC CHECKDB

T-SQL Tuesday Logo

As a part of the T-SQL Tuesday run by Rob Sewell this month, I wanted to throw in a little post about using Test-DbaLastBackup which I will also be showing off a this year’s SQL Summit!


Come to the Precon

If you like this post, don’t forget to signup for me and Chrissy Lemaire’s precon at the 2017 SQL Summit for more awesome PowerShell <3 SQL Server magic with dbatools!

Test-DbaLastBackup

As data professionals we know that safeguarding our data is one of our most important jobs, and yet a significant amount of us continue to find excuses not to verify the integrity of our data.

I want to show you an uber simple method to automate testing your entire estate worth of backups.

Before we move forward, I want to note this process does perform a restore and DBCC checkdb on the server you specify, so please don’t run this in production and come to me upset that your IO and CPU time shot through the roof 😀

However, if you only have a smallish or sleepy production environment, this will run just fine side by side, otherwise I demonstrate a parameter to run this on a different server.

Lastly, before we begin, this assumes you’ve already installed and imported dbatools, because why wouldn’t you have?

Code

"sql2012","sql2005" | Test-DbaLastBackup -Destination "Sql2016"

This:

  • Defines a list of two servers (PowerShell lists are as easy as “”,””)
  • Pipes them to the Test-DbaLastBackup command.
  • Which then:
    • Gathers information about the last full backups for all of your databases on that instance.
    • Restores the backups to the Destination with a new name. If no Destination is specified, the originating server will be used.
    • The database is restored as “dbatools-testrestore-$databaseName” by default, which you can change with the -Prefix parameter.
    • The internal file names are also renamed to prevent conflicts with original database.
    • A DBCC CHECKTABLE is then performed.
    • And the test database is finally dropped.

If you are super stuck on the restore portion but would like to do a VERIFYONLY, there is a -VerifyOnly parameter switch.

Some other useful parameters you might need to use in a typical scenario:

-Database Allows you to specify a list of databases to specifically check, useful if you have just one in mind.

-MaxMB Prevents databases over X MB from being restored.

-ExcludeDatabase Exclude specific databases (for that one gigantic one you know you don’t want to touch.)

-DataDirectory Alternate data directory (besides default) you want to restore the database files to test.

-LogDirectory Alternate log directory (besides default) you want to restore the database files to test.

Watch

If you like video, wait no more, here’s a youtube demo of Test-DbaLastBackup

Thanks for your time, and I hope you enjoyed.